Scenarios
Scenario Management gives finance teams a governed way to create, version, and audit planning and forecast scenarios directly in Una. Scenarios live inside Una's multi-dimensional model, so every version retains full lineage, lock controls, and an operation history.
Core concepts
Scenario groups and versions
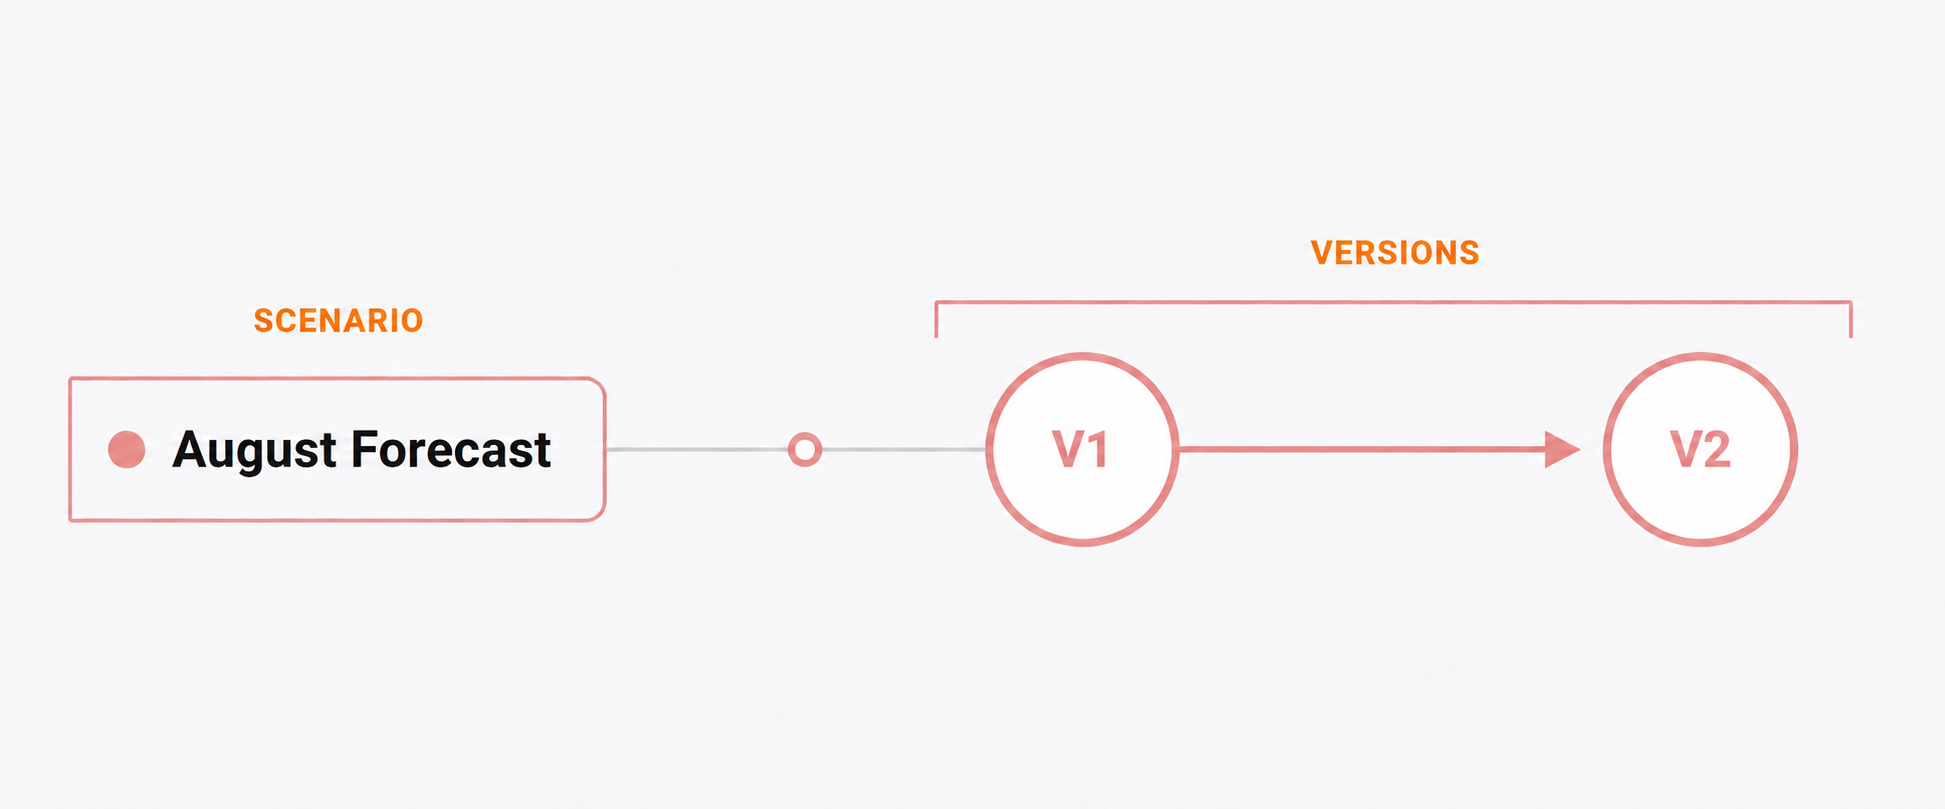
Scenarios are organized in a two-tier hierarchy:
- Scenario group — a named planning track (e.g. "Annual Budget"). The group itself holds no data; it exists to organize versions under a common name and type.
- Version — a child of a scenario group (e.g. "Annual Budget - V1", "Annual Budget - V2"). Data lives in versions.
Scenario types
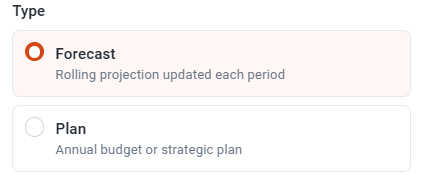
When you create a scenario group, you choose one of two types — this cannot be changed after creation:
| Type | Description |
|---|---|
| Forecast | Automatically actualizes with real actuals data when it is loaded. |
| Plan | A frozen snapshot that never actualizes. Use this for approved budgets and board plans that should not be overwritten by actuals. |
Name immutability
Scenario and version names cannot be edited after creation. The combination of scenario name + version name must be unique across the dimension. If you need a different name, delete the existing entry and create a new one.
Navigating to Scenario Management
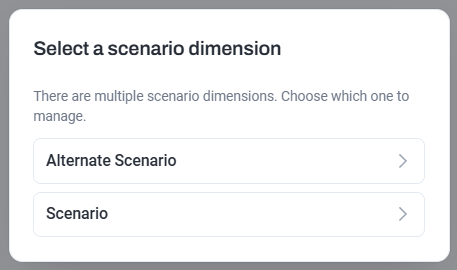
Select Scenarios from the left navigation bar. If your model has more than one scenario dimension, you will be prompted to select which one to work with before the screen loads. Models with a single scenario dimension open directly.
The lineage tree
The lineage tree is the default view in Scenario Management. It shows all scenario groups and their versions as a visual graph.
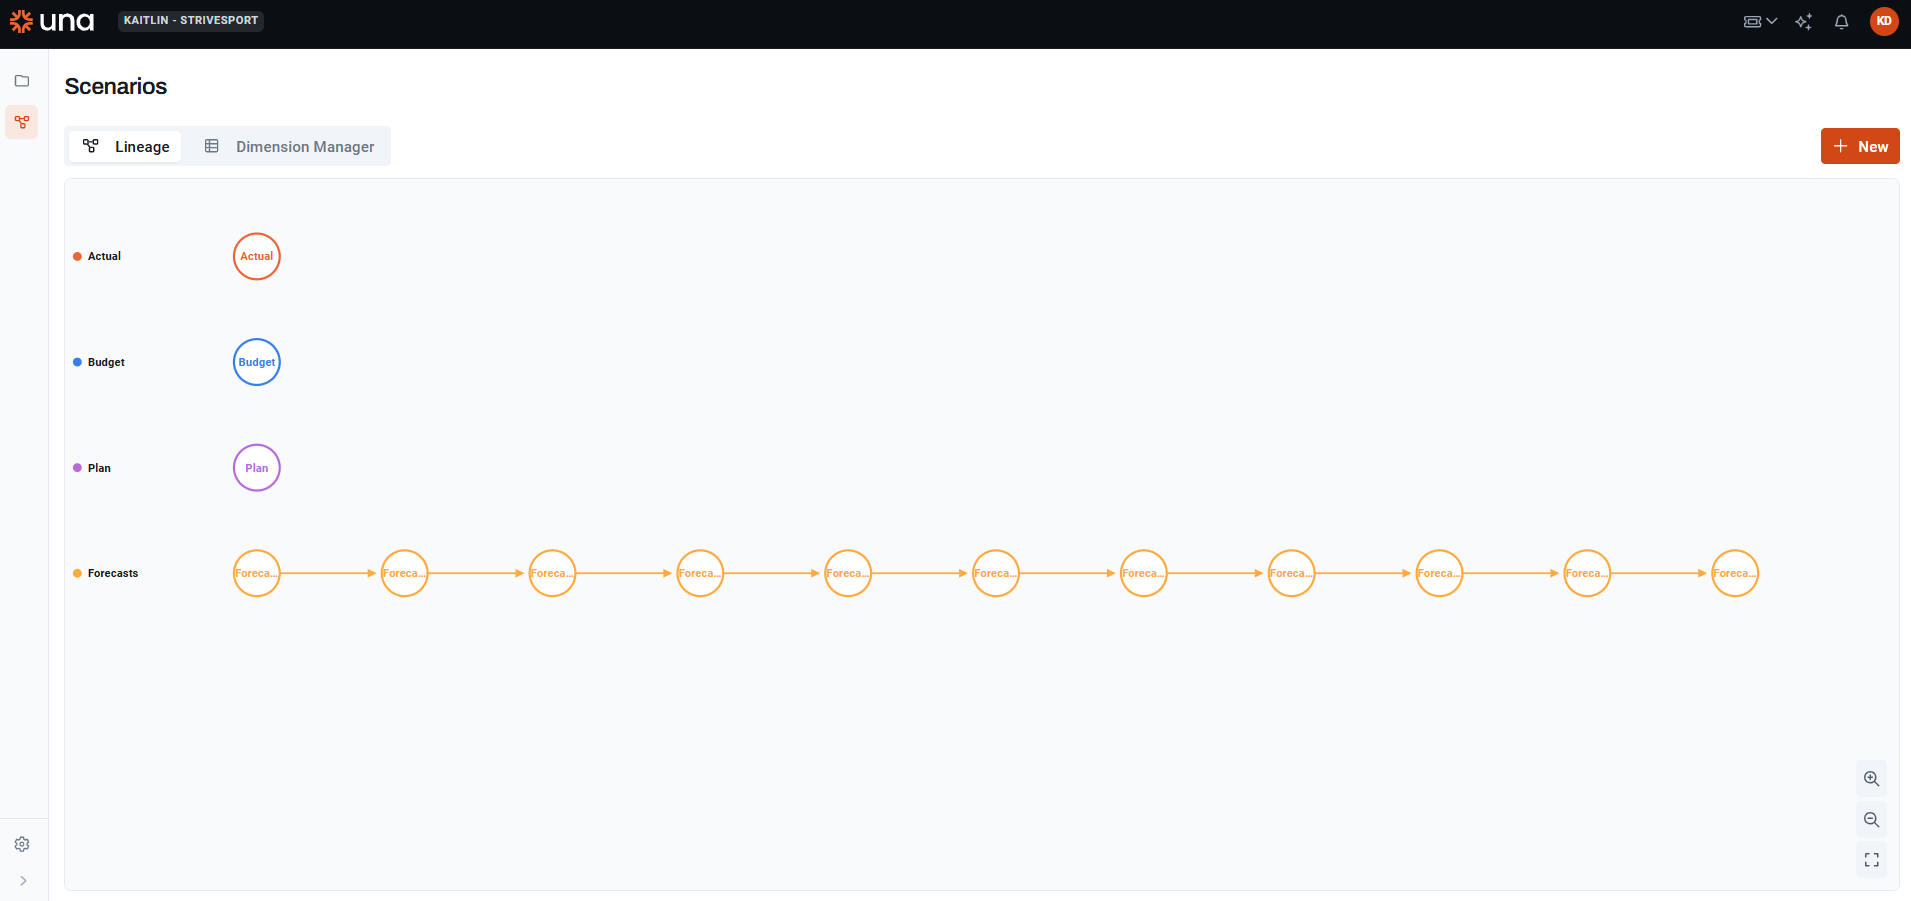
- Solid lines connect versions within a scenario group.
- Dotted lines show copy lineage — where data was copied from when a version was created from an existing one.
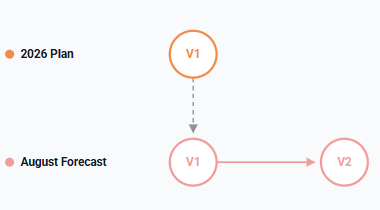
Click any version node to open the version detail panel on the right, which shows the scenario's type, lock state, available operations, and the full operation history for that version. The + New Scenario button is in the header.
Dimension Manager view

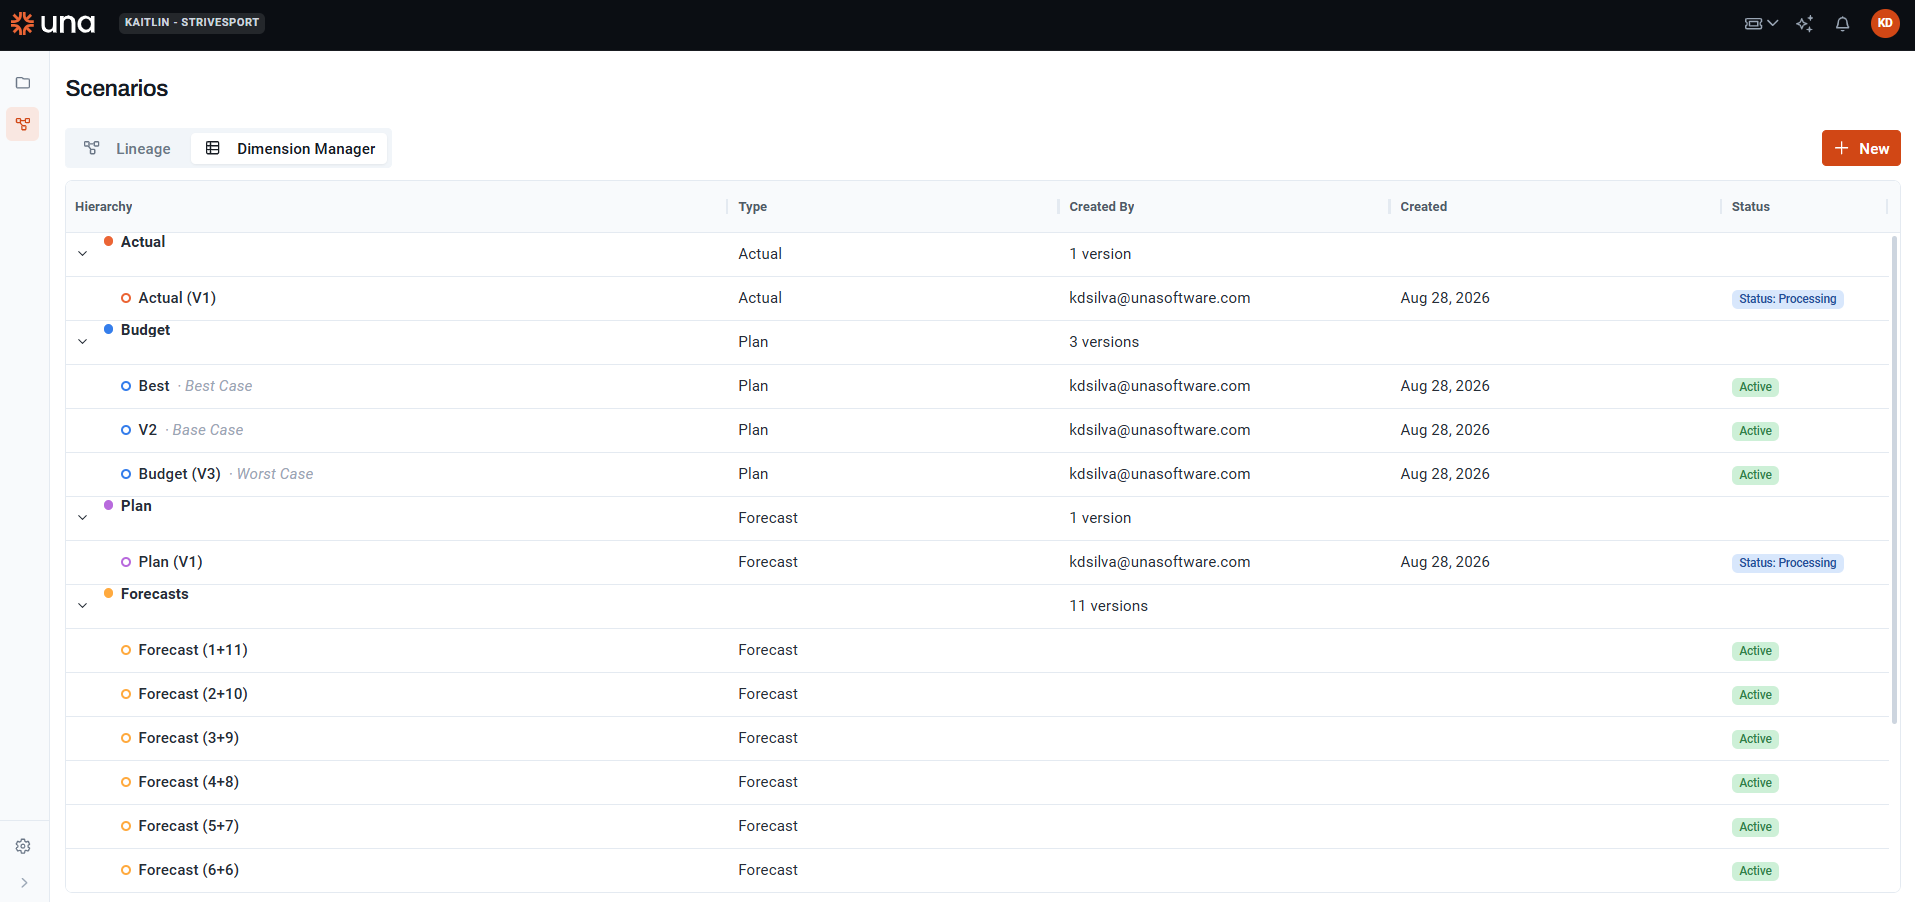
Use the toggle in the header to switch from the lineage tree to a Dimension Manager view of the scenario dimension. This view is read-only — you cannot edit scenario hierarchy members here. All structural changes (create, delete, lock) happen through the Lineage screen.
Creating a scenario
- Click [+ New] in the header.
- Enter a name for the scenario group (immutable after creation).
- Select the scenario type: Forecast or Plan.
- Choose a source:
- Blank — creates an empty V1 with no data and no lineage edge.
- Existing version — creates V1 by copying data from the selected version. A dotted lineage edge connects the source to V1 on the tree.
- Name the first version (defaults to "V1"; immutable after creation).
- If the model has sub-models, select which sub-models to include in the initial copy.
- Confirm to create the scenario group and V1.
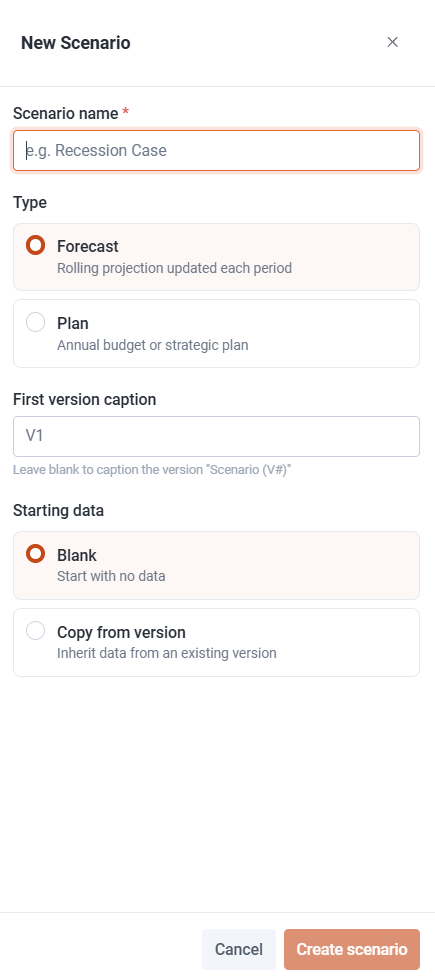
If a scenario name already exists, the user will be prompted to change it to a unique name.
Creating a new version
- Select a version node on the lineage tree.
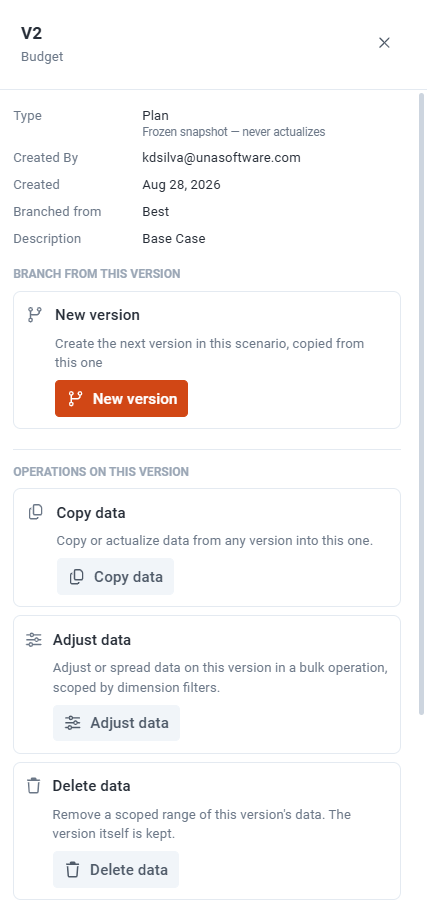
- In the detail panel, click New Version.
- Name the new version (immutable after creation; the scenario name + version name must be unique).
- Choose a source version to copy data from, or select Blank.
- Select sub-models to include, if applicable.
- Confirm. The new version appears on the tree connected by a solid line.
Operations on a version
Select a version node to access available operations in the detail panel. All operations are logged to the version's operation history with the operation type, scope, source/target, user, and timestamp.
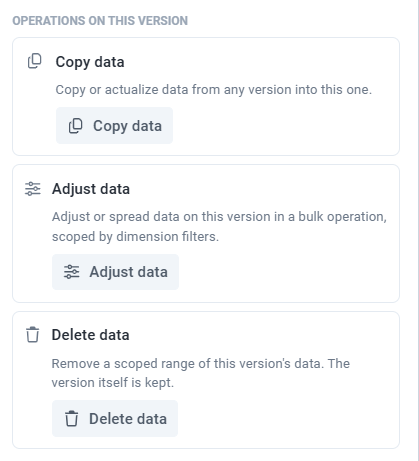
Copy data
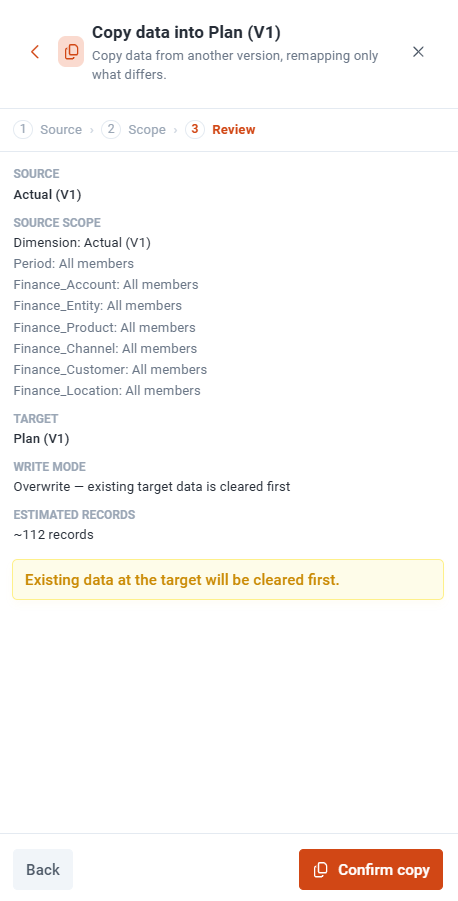
Copy data from any version into the currently selected version. The flow has three steps:
Step 1 — Source: Select the source version. The target is always the version you had selected when you opened Copy Data.
Step 2 — Scope:
- Define the source scope — the dimension filters that determine what is read from the source. The source version is auto-filled as the Scenario filter. Unfiltered dimensions include all members; a yellow warning lists any unspecified ones.
- Define target differences — the target inherits the full source scope. Only specify dimensions where the target should land somewhere different (e.g. source Period FY26 → target Period FY27). The target version's scenario is auto-filled.
- The default write mode: Overwrite — existing data at the target intersection is cleared before writing.
Step 3 — Review: Confirm the summary — source, full source scope, target differences, write mode, and an estimated record count — then click Confirm.
Common examples:
- Seed a new scenario from actuals: source = Actuals V1, no target differences except Scenario = new version.
- Carry data forward to a new period: source = Budget V1, Period FY26 → target difference Period FY27.
- Seed a new department from an existing one within the same version: source = target = Budget V1, source entity: Sales → target entity: Marketing.
Copying into a locked version is blocked: "[Version] is locked. Unlock it before copying data into it."
Adjust data
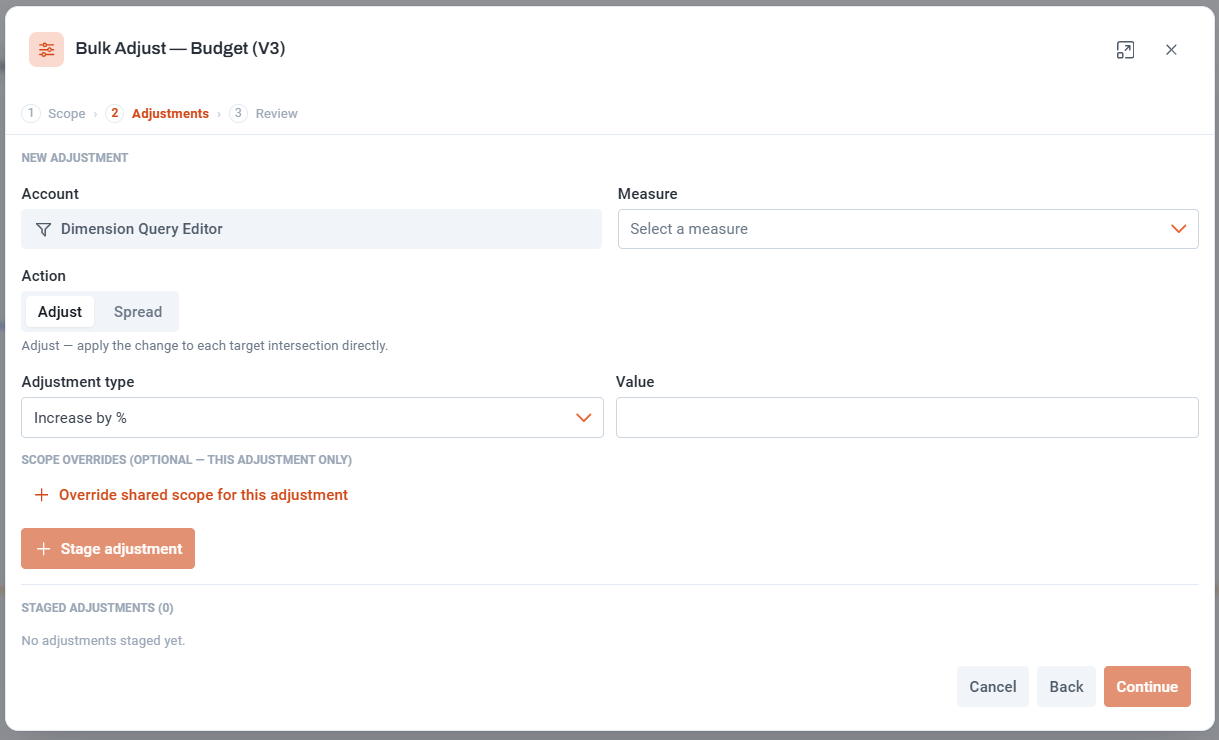
Apply bulk adjustments to cell values in a version without opening a canvas. The Adjust modal can also be launched by right-clicking a cell or range selection in a matrix widget, which pre-populates the scope from the selection.
- Click Adjust Data in the detail panel.
- Configure:
- Accounts — the accounts to adjust.
- Scope — filter by Period and any other model dimensions. Unfiltered dimensions apply to all members.
- Adjustment type:
- Increase/Decrease by amount — adds or subtracts a fixed value.
- Increase/Decrease by percentage — scales values by a percentage.
- Set (override) — replaces values with a specific value.
- Review staged adjustments, then click Apply.
Parent selections apply to leaf members. If no calculation workflow is configured for the model, adjustments are applied immediately.
Delete data
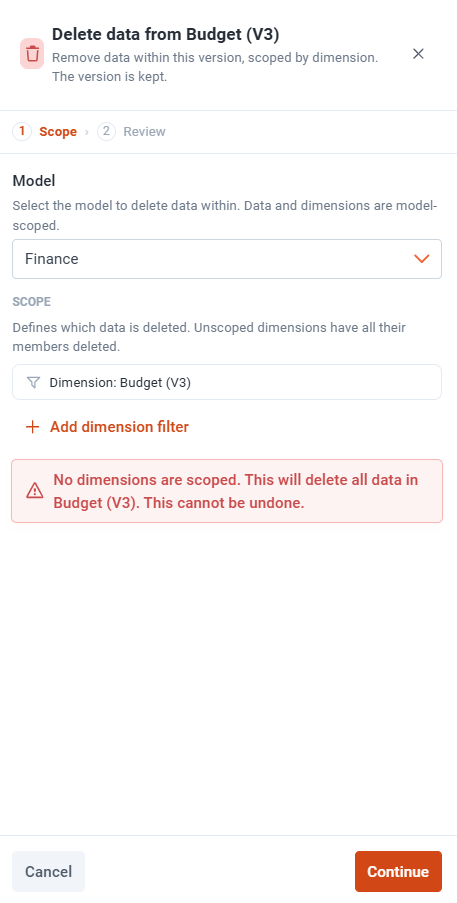
Remove data from the selected version within a specified scope. Scope by account, period, and any other model dimensions. Unscoped dimensions remove data across all members.
Lock and unlock

Lock a version to prevent any further writes. Locked versions:
- Cannot have data written to them (copy, adjust, or delete operations are blocked).
- Can still be used as a source for copy operations.
- Cannot be deleted until unlocked.
Locking and unlocking are both logged in the operation history. A locked scenario group (parent) does not automatically lock its child versions — lock each version individually.
Delete a version or scenario

In the detail panel, under Version Management:
- Delete Version — removes the version and its data. Cannot delete a locked version. Cannot delete the only version of a scenario if the scenario group is locked. A warning is shown if other versions have lineage from this version.
- Delete Scenario — deletes the scenario group and all of its versions after confirmation.
Operation history entries that reference deleted versions continue to display the version name as "[Scenario name — Version name] (deleted)".
Actualization (Forecast scenarios only)
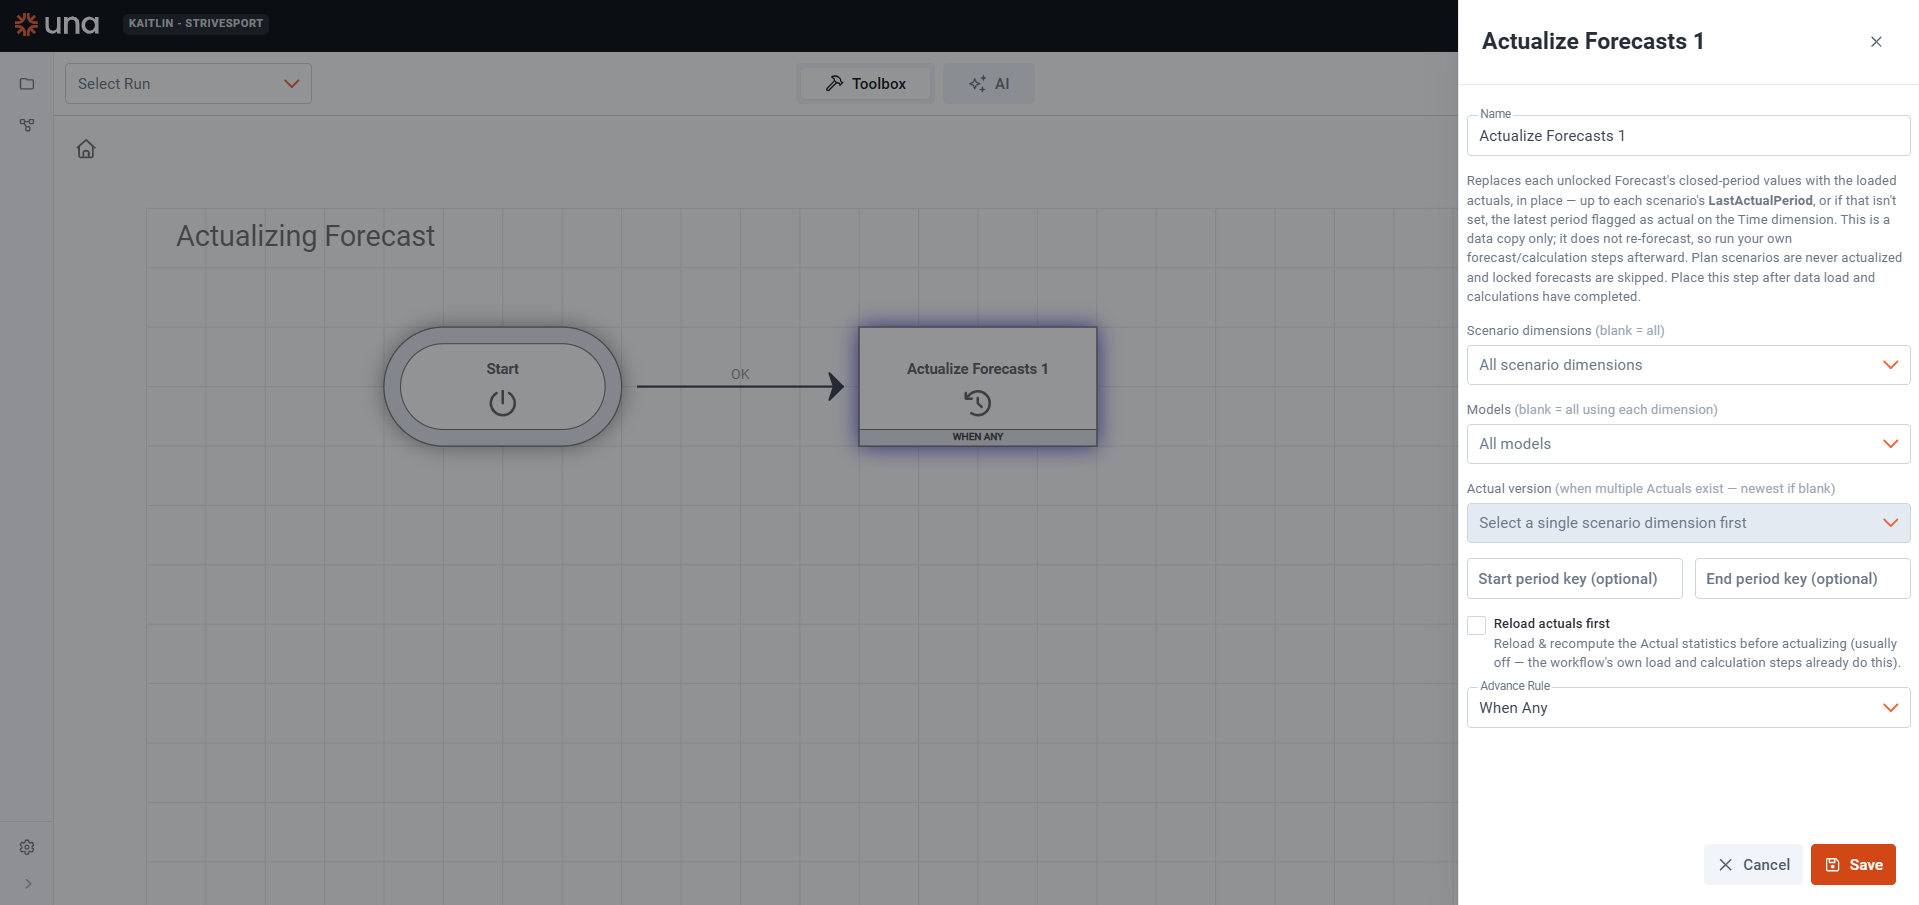
Forecast versions automatically actualize when actuals data is loaded.
- If the
LastActualPeriodproperty is set on a version, actualization only updates data up to that period — useful for locking in historical forecast snapshots. - If the
LastActualPeriodproperty is not set, the version updates to the current actual period each time actuals are loaded. - Actualization can be triggered on demand from a workflow or will run automatically when the actuals load workflow fires.
Plan versions never actualize.
MCP support
Scenario Management is available to AI agents via MCP. Supported MCP operations include bulk adjust and adding a new version. Deleting scenarios or versions via MCP is not supported — deletions require explicit user confirmation in the UI.